The tools needed for the job are:
- T5 torx driver.
- x-acto knife.
- Small wire cutters.
- Paper cup.
- Your new lanyard.
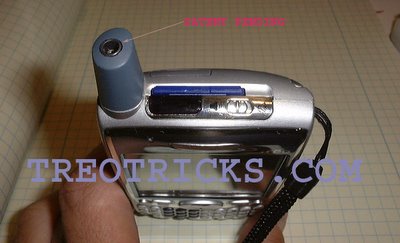
Here is a picure of my lanyard below. It is about 8" (20 cm) long and the loop diameter that attaches to the boss internally is 0.048" (1.2 mm). You should find something similar. Make sure that you select a lanyard that is both compact and nice looking, since it will be permanently attached to your Treo

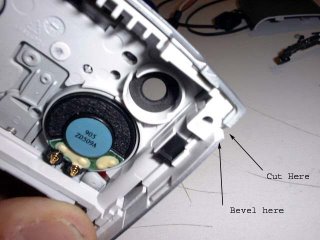
After the disassembly of the phone, you will need to do some prep work to the front half of the Treo shell, or faceplate, and to the side chrome (or rubberized) trim piece. First of all, cut a 1/16" (2mm) piece from one end of the side trim piece. The edge to cut off is closest to where the stylus and camera are located. A picture shows where to cut below. Also, cut more material internally, this is needed to give clearance between the screw boss and the side chrome trim piece for the lanyard loop
The front shell needs to have some plastic cut in two places to have clearance for the lanyard loop. A picture below shows where.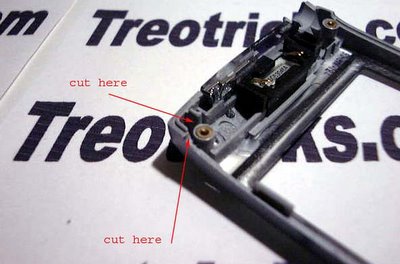
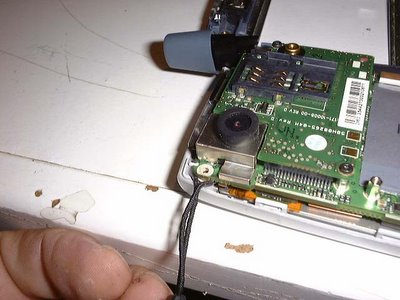
The Treo is now ready for assembly. Below shows how the lanyard loop should loop around the screw boss. Pay close attention to how the loop wraps around. The loop portion on the right comes out above the loop portion that comes from the left. This seems to make a bis difference is ease of assembly.
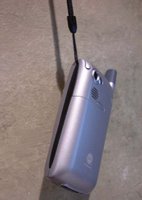
The Treo is now ready for assembly. Make sure that both sides of the shell snap together before you screw it together. Below is a picture of the finished product.
Click here for the Treo 650 3.5mm Audio Jack Hack
posted by TreoTricks at 2:59 PM
![]()
![]()


5 Comments:
very very cool....
wow man these guides are great! keep it up :)
What on earth is the paper cup for?
the paper cup is there to put your screws in
The paper cup is for putting parts in during disassembly...
Any chance of a guide (or hints at least) for the antenna with headphone jack thing?
Post a Comment
<< Home