Friday, November 25, 2005

Treo 650 Lanyard install
With this mod and the rubberized grips of the previous post, the Treo will much more safe and secure in your hand. The lanyard is permanently and securely attached internally, wrapping around a crew boss.
Make sure you have a well lit workspace, with plenty of room to work in and a place to keep your tools and disassembled parts. I would avoid carpeted areas just in case you drop a screw or some other small part. Also, make sure your workspace is ESD safe and avoid getting up too often and increasing the possibilites of generating a static discharge and zapping your beloved treo.

The tools needed for the job are:
  1. T5 torx driver.
  2. x-acto knife.
  3. Small wire cutters.
  4. Paper cup.
  5. Your new lanyard.

Here is a picure of my lanyard below. It is about 8" (20 cm) long and the loop diameter that attaches to the boss internally is 0.048" (1.2 mm). You should find something similar. Make sure that you select a lanyard that is both compact and nice looking, since it will be permanently attached to your Treo

After the disassembly of the phone, you will need to do some prep work to the front half of the Treo shell, or faceplate, and to the side chrome (or rubberized) trim piece. First of all, cut a 1/16" (2mm) piece from one end of the side trim piece. The edge to cut off is closest to where the stylus and camera are located. A picture shows where to cut below. Also, cut more material internally, this is needed to give clearance between the screw boss and the side chrome trim piece for the lanyard loop

The front shell needs to have some plastic cut in two places to have clearance for the lanyard loop. A picture below shows where.

The Treo is now ready for assembly. Below shows how the lanyard loop should loop around the screw boss. Pay close attention to how the loop wraps around. The loop portion on the right comes out above the loop portion that comes from the left. This seems to make a bis difference is ease of assembly.


The Treo is now ready for assembly. Make sure that both sides of the shell snap together before you screw it together. Below is a picture of the finished product.

Click here for the Treo 650 3.5mm Audio Jack Hack

Tuesday, November 22, 2005

How to Rubberize the Treo 650 Side Grips
This upgrade will require further disassembly than what was described in my previous post. Read up on some of my other posts like the lanyard install so you can incorporate them at the same time.
Make sure you have a well lit workspace, with plenty of room to work in and a place to keep your tools and disassembled parts. I would avoid carpeted areas just in case you drop a screw or some other small part. Also, make sure your workspace is ESD safe and avoid getting up too often and increasing the possibilites of generating a static discharge and zapping your beloved treo.
The tools needed for the job are:
  1. T5 torx driver.
  2. x-acto or sharp pointed device.
  3. paper cup (for small parts).
  4. Small flat blade screwdriver.
  5. Air compressor.
  6. Sandblasting nozzel.
  7. A big supply of Baking Soda (Sodioum Bicarbonate).
  8. 400 grit Aluminun Oxide wet sandpaper.
  9. 12 oz. aerosol can of Plasi-dip.
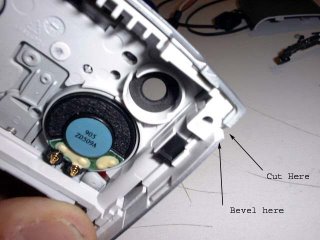
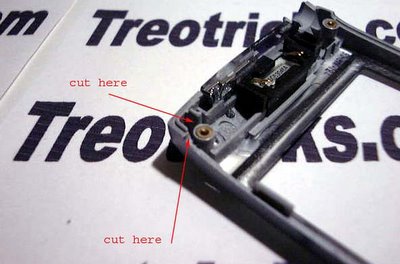
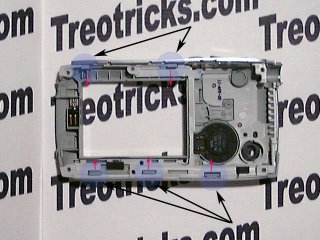
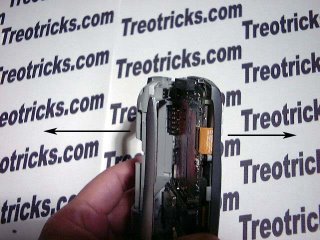
After the disassembly of your treo, you need to remove the side grips from rear shell. Place the rear shell with the outside portion down as shown below. Gently pry the 5 tabs highlighted in blue in the direction of the red arrows, all while separating the 2 halves.

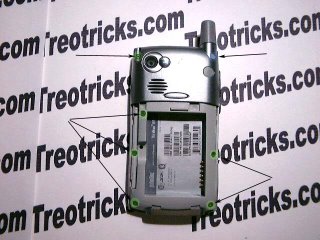
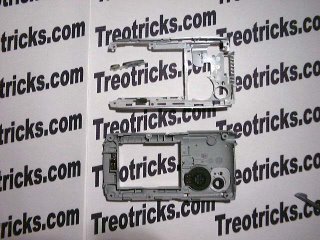
You will end up with the 2 pieces shown below PLUS the side buttons. Put the buttons aside in a safe place.


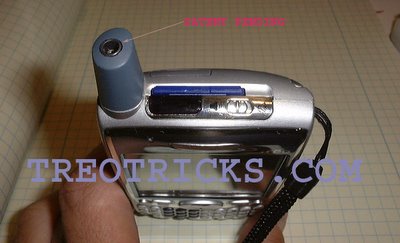
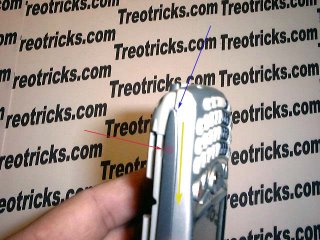
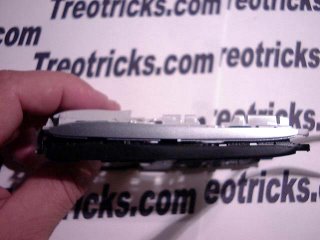
Now you need to prepare the chrome side pieces to get the rubber to stick. this is very imporant to get a profesional and durable result. You will need to your compressor set at a relativly low setting of 60 Psi. Check it and make sure that it stays around that setting while flowing air. You will need to blast away the shiny chrome finish on both sides and around the edges. Below is a picture of how it looks before and after.


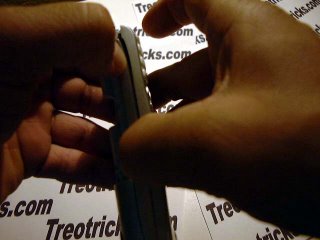
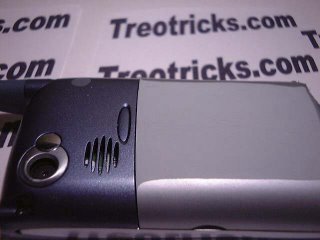
And here is a picture showing how the plastic should look without the finish on a battery cover.


After you blasted the chrome finish, run the wet sandpaper over it just to roughen it up and get the paint to stick. Rinse the plastic piece, shake the excess water off and let it sit in a nice warm area or under a light so it can dry. I would give it a good 4 hours and make sure it does not get dirty and dusty meanwhile.

Now you should find a clean, well ventilated area for spaying the plastic. Follow the insturctions on the can. Can should be a normal room temperature and shake it good. masking is not needed but you should concentrate on just spraying the areas that will be exposed.Spray a nice first coat that covers all the recently exposed bare plastic. It may look thick, but it will be ok. Wait 1/2 hour and reapply a second coat and then a third coat.

Place the plastic in a warm area where it can dry. Wait at least 4 hours before you reassemble your treo.

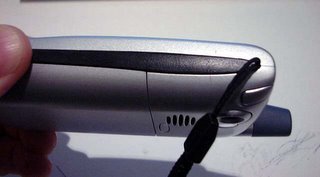
Assembly in the reverse order. Snap the now rubberized piece to the rear shell and make sure the 5 clips snap. It may require squezing the 2 pieces together tightly since the rubber added thickness

Go ahead and put your buttons in where they belong and assembly your Treo back together by snaping together the front and reat shells. Insert the antenna back in and use the long screw to secure it in place. Go ahead and tighten the remaining 6 screws. make sure you do not overtighten. Add you battery, rear cover, memory card, SIM (if needed) and you are ready to go.... Isn't she beautiful?

Friday, November 18, 2005


How to Disassemble Your Treo 650
Disassembly of the Treo 650 is relativly easy. Make sure you have a well lit workspace, with plenty of room to work in and a place to keep your tools and disassembled parts. I would avoid carpeted areas just in case you drop a screw or some other small part. Also, make sure your workspace is ESD safe and avoid getting up too often and increasing the possibilites of generating a static discharge and zapping your beloved treo.
The tools needed for the job are:
  1. T5 torx driver
  2. x-acto or sharp pointed device
  3. paper cup (for small parts)
First of all, read the entire proceedure so you know what you are getting into. become very familiar with the proceedure and you you minimize the possibility of making a mistake.
The first step is to make sure your data is backed up just in case you encounter problems and need access to it later. After that, you should remove the battery cover and battery, and also do not forget to remove the SIM tray (if needed) and you might as well remove the memory card.
Place the Treo face down and remove the 7 torx screws as indicated by the black arrows in the picture. The torx screw for the antenna is longer than the rest, and sits below a rubber plug and tamper-evident label. It is indicated in the picture by the blue circle. Remove the rubber plug and label with your sharp knife carefully.

After removing all the screws, remove the antenna by pulling it straight out. Next up is the hardest step... spliting both halves of the case!

Start by holding the treo as shown below, work on separating the side that does not have the antenna. Place your left thumb where the red dot is and squeeze in. The front half of the case needs to be "pryed out" to unclip it from the other half. this is done by inserting your right thumbnail in between the halves (blue arrow) and running it down the split forcefully but slowly (yellow arrow).

Once you have progressed far enough along, it should look like the picture below.


Once you have that side split, go ahead and separate both edges by opening it up like a book... but do it very carfully and you should be able to unsnap and split the other side. As you can see from the picture below, the electronics and screen stay with the front half, and the rear half separates with the side chrome pieces


That is it to opening up your Treo. The next how-to's will show how to rubberize the chrome side pieces, add a lanyard, an internal impedance fix hack, and to add a 3.5mm audio out jack up top... cool!!!